If you have a Gmail account, you can create Google Forms. Initially, these forms work as a survey, but there is an option to turn a survey into a test.
These tests allow teachers to get statistics on students responses. A test created with Google Forms can accept responses for as long as we wish. Therefore, it can be used in the classroom, as homework or as a combination of a classroom activity which is available for those who didn’t attend the class or who want to take the test again at home.
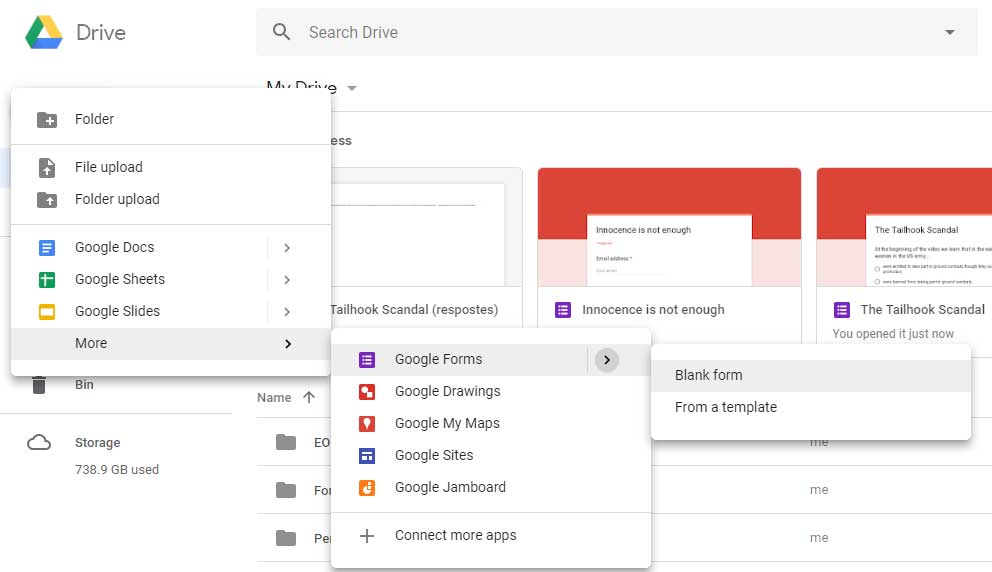
To create a test, go to GoogleDrive, choose “New”, then “More”, and then “Google Forms / Blank form
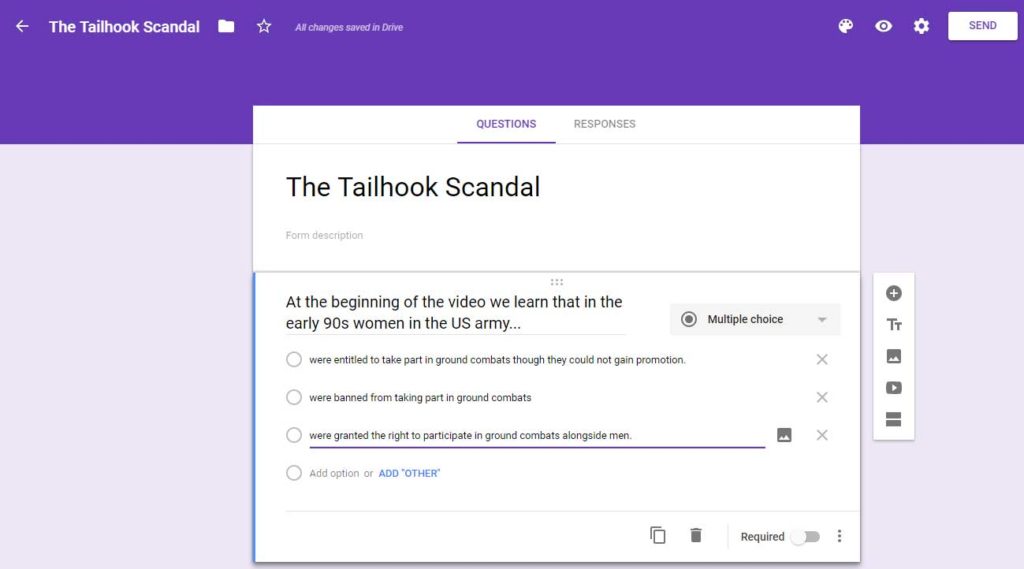
Then, write a title for your test and start writing a question. Here, you’ll see examples for multiple-choice questions, but there are other question types you can use as well.
When you decide to turn the form into a test (you can do it at any stage of the creation of the form), go to “Settings” (the wheel on the top right corner of the screen).
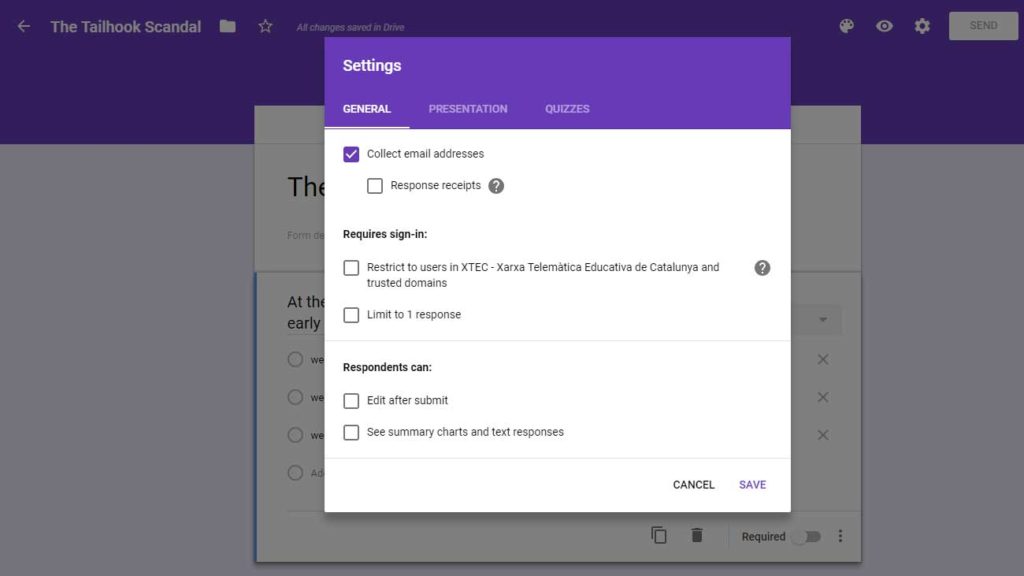
The settings screen contains three tabs, which you should explore and adjust according to what you need. Here, for example, “Collect e-mail addresses” is ticked because I want to see who answered the quiz (of course, somebody can cheat …). You can require sign-in and then limit the quiz to one response, etc.
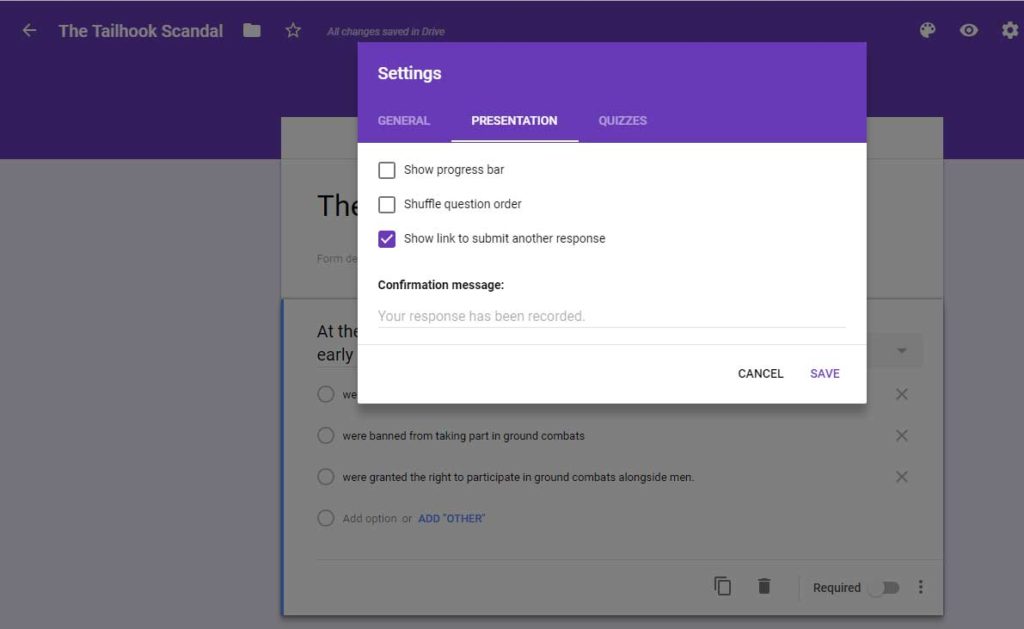
The second tab in “Settings” allows you to set up a progress bar, shuffle question order and show link to submit another response. You can also edit the message students see when they have submitted the form.
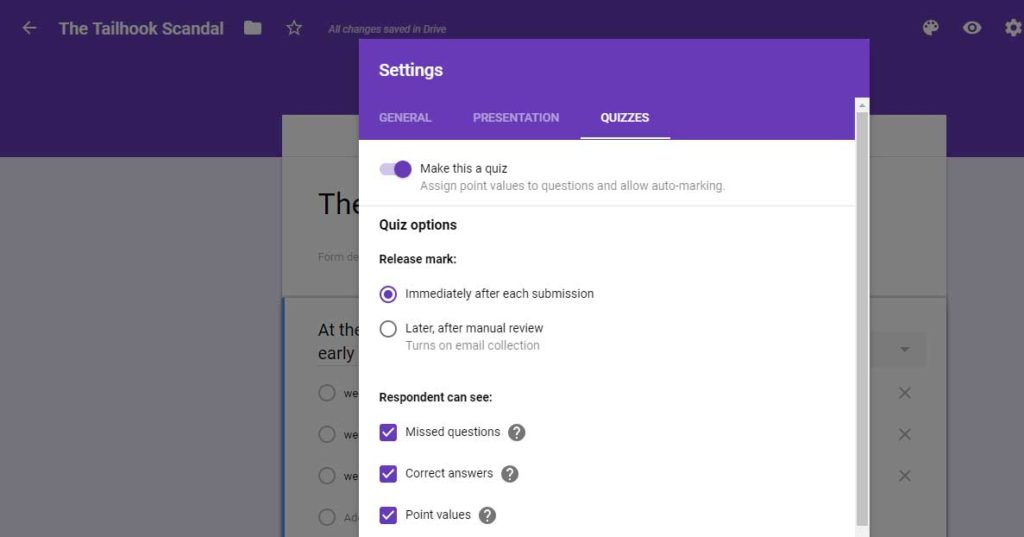
And then we have the most important tab, “Quizzes”. Here, you should move the slider to “Make this a quiz”. Then you can define the other options. Once you have done this, you can define the right answers and add feedback.
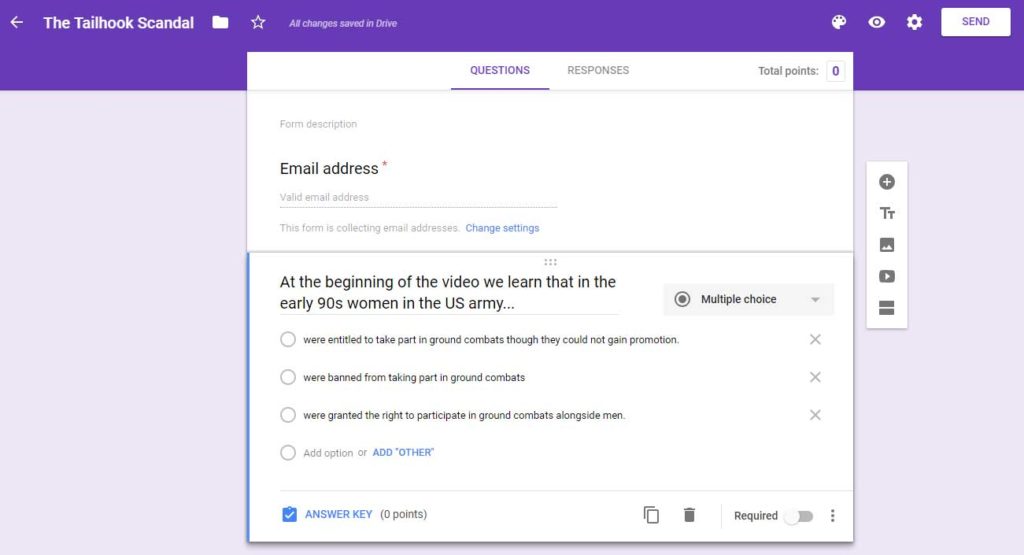
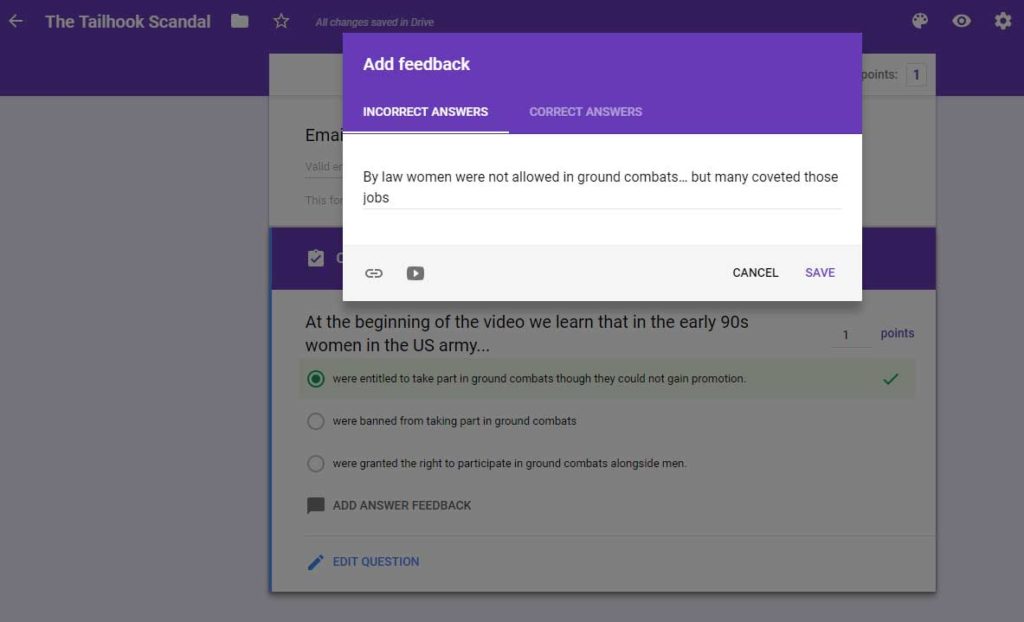
To define the correct answer, add feedback and award points, click on “Answer key”.
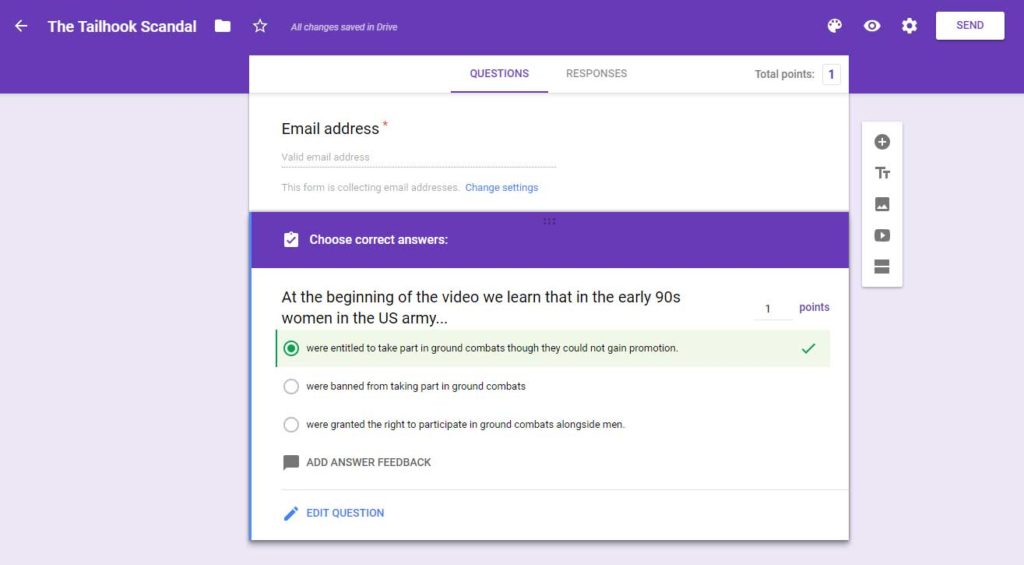
You can add feedback for correct answers and for wrong answers. In the feedback, you can include a link or a video.
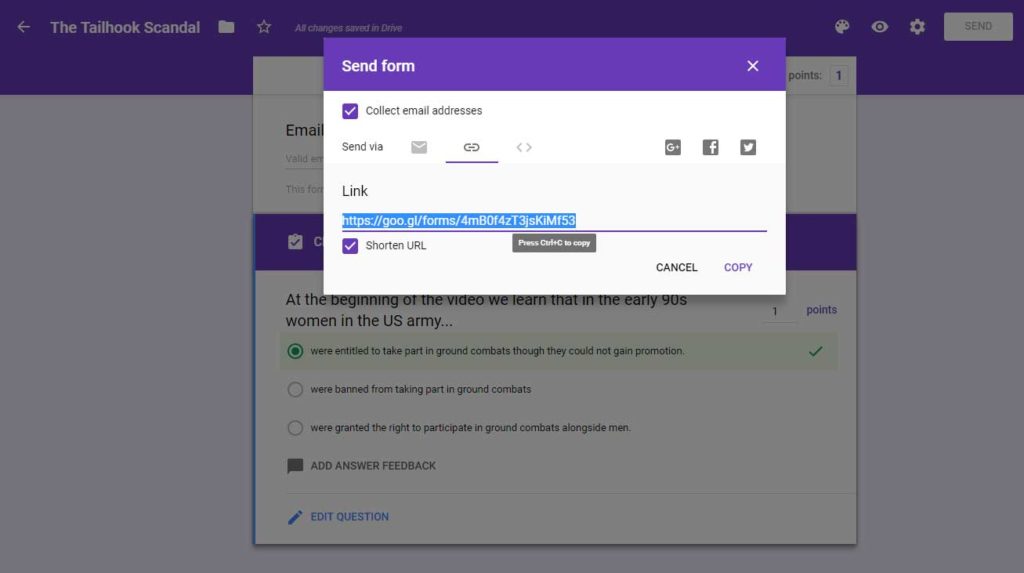
Once your test is ready, click on “Send” (button in the top right corner) and you’ll get a link, which you can shorten to share with your students.